
Do you find that it is difficult to
uninstall Spyhunter 4 efficiently from your PC?
Do you have any idea while you can’t remove
Spyhunter 4 from your laptop by using “Uninstall a Program” in Windows 8?
Are you confused that there are error
messages pop-up? So you can not uninstall Spyhunter 4 from your PC.

In this case, what would you like to do to
handle the Spyhunter 4 removal problems? Learn the Spyhunter 4 uninstall
instructions as following.
At the beginning, you should know why you
need to uninstall Spyhunter 4 from your computer. It is one of powerful
antivirus program in the world. It can help you protect your PC from Virus,
Worm and Trojan attacking. Unfortunately, Spyhunter
4 also eats up so much system resources from your computer so that your
computer runs slowly. This is an annoying problem. Meanwhile, you want to try
another outstanding antivirus program to protect your PC. No matter what
reasons they are, you just want to uninstall Spyhunter 4 from your laptop. And
you want to remove it completely with an easy way.
The standard way to fully delete Spyhunter 4 from your PC
1.Windows Xp system
Firstly, you should click “Start”, and then you need to click “Control Panel”.
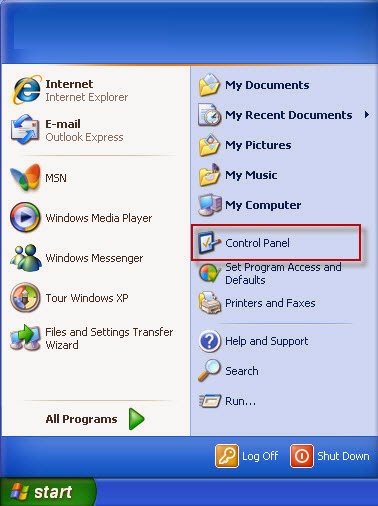
Next, you should double-click “Add/Remove Programs”.
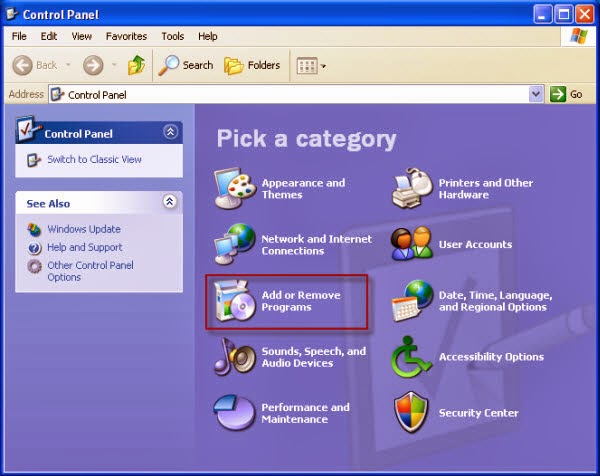
Next, you should select the Spyhunter 4.
What’s more, you need to click “Remove
or Change” and follow the steps provided.
2.Windows 7/Windows Vista system
You should click “Start” menu, Search, type Programs
and Features, and click Go.
And then you need to double-click “Programs and Features”.
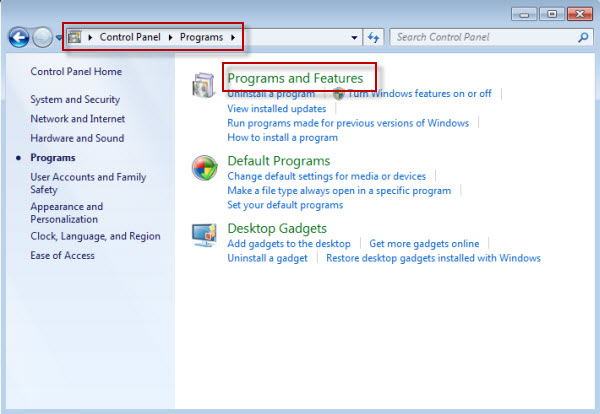
Next, you need to select the Spyhunter 4. Next,
you should click Uninstall and
follow the steps provided.
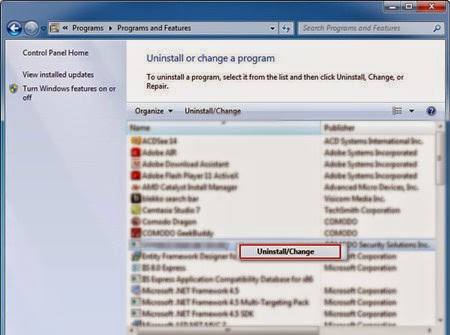
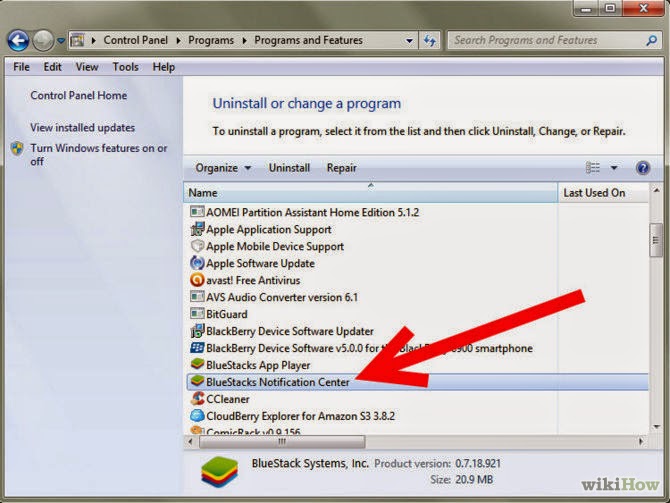
3.Windows 8
If you are using Windows 8, simply drag your mouse pointer to the right edge of the
screen, select Search from the list
and search for “Uninstall” .Or
you can right-click on a bottom left hot corner (formerly known as the Start
button) and select Uninstall a program from there.

When the “Control Panel” window opens click
on the “Uninstall a program” option
under “Programs” category. This
option is shown by the arrow in the image below. If you are using the “Classic View” of the Control Panel,
then you would double-click on the “Programs
and Features” icon instead.
-Step-4.jpg)
After finishing the job above, you need to
remove any Spyhunter 4 entries from the Windows registry. You need to click “Start” menu, and then click “Run”.

Next, you need to type “regedit” and click “OK”.
In the “Edit” menu, you need to click “Find”
and search for the keywords Spyhunter 4.
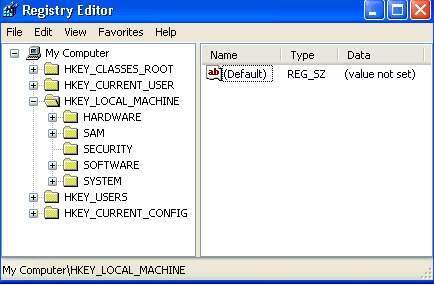
Finally, you should use the right-click
to delete all the search results. You will find you have already removed Spyhunter
4 completely from your computer. In fact, it is not recommended that you delete
Spyhunter 4 manually due to it is high risky to make mistakes when you do the
processes. And your computer might be crashing and freezing.
What is the most efficient way to uninstall Spyhunter 4?
The most frustrated problem is that there
are error messages pop-up when you try to get rid of Spyhunter 4. This makes
your computer work unstably. To handle this issue, you can try the uninstall
tool such as Perfect Uninstaller
which is produced to uninstall any programs and remove them totally from your
computer. With the “Force Uninstall”
function, you can uninstall any programs as you like by using Perfect
Uninstaller.
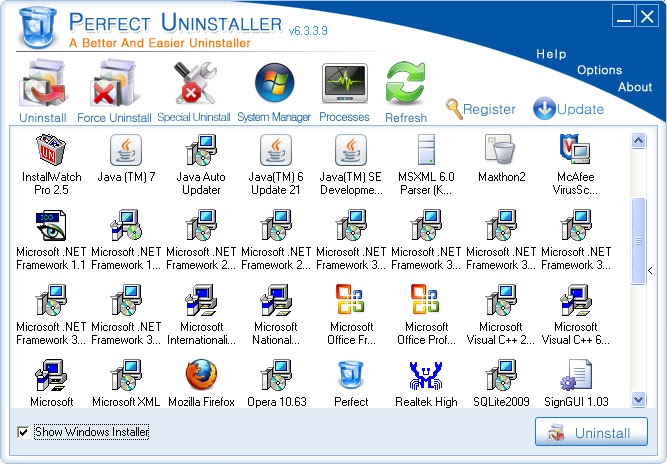
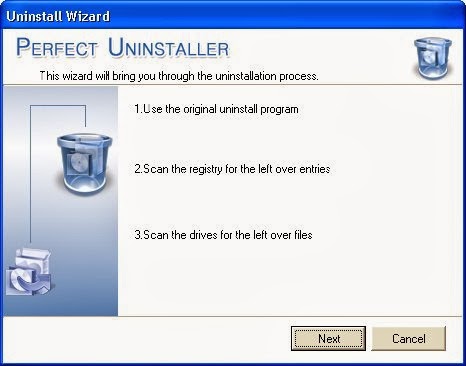
Force Uninstall Spyhunter 4 with Perfect Uninstaller
Perfect
Uninstaller will run automatically and you just
follow the processes provided to start to uninstall Spyhunter 4 completely. And
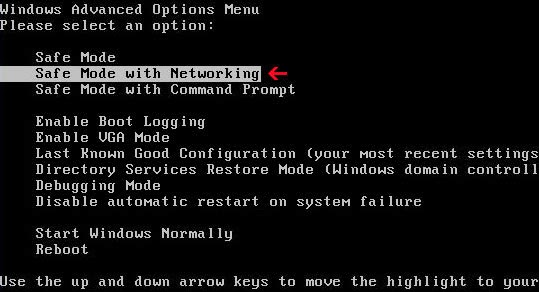
you will get best performance system on your PC. So you need to go into the Safe Mode with Networking, and then
follow the software removal guides below:
2.Close all running processes including
programs and browsers in the Task Manager before you run Perfect Uninstaller
3.Find and locate the unwanted software on
the currently installed programs list
4.You could right-click the folder of the
unwanted program (normally, in C:\Program Files) or C:\Program Files (x86) in
Windows 7 system 64 bits and then select “Force
Uninstall with PU” to apply the “Force Uninstall” utility.
5.Follow the prompt “Next” steps to delete Spyhunter 4.
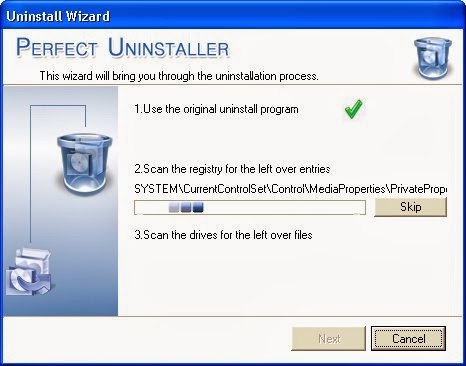
6.Click "Next" to start scanning the registry files about the unwanted
program.
7.It will take some time to finish registry
scanning. If you don't want to wait, you could click "Skip" option and cancel the scanning.
8.After the registry scanning is completed,
click "Next" button to
select all related files.
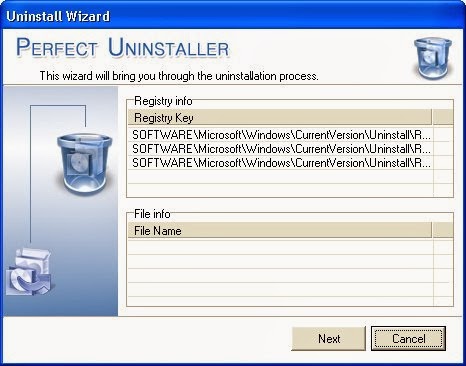
9.Click "Next" button to delete all related files.
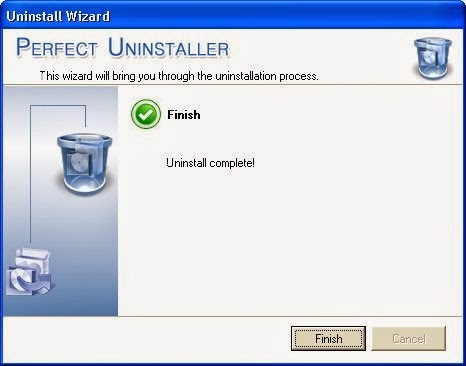
10.Finally, click "Finish" button to complete the
removal steps.
After you finish the onscreen removal
steps, Spyhunter 4 has been deleted from your PC.
What’s more, you could double-check the
infection of the program with RegCure
Pro to improve your PC performance.
2.Click “Click to Start Scan” button to repair and optimize your computer.
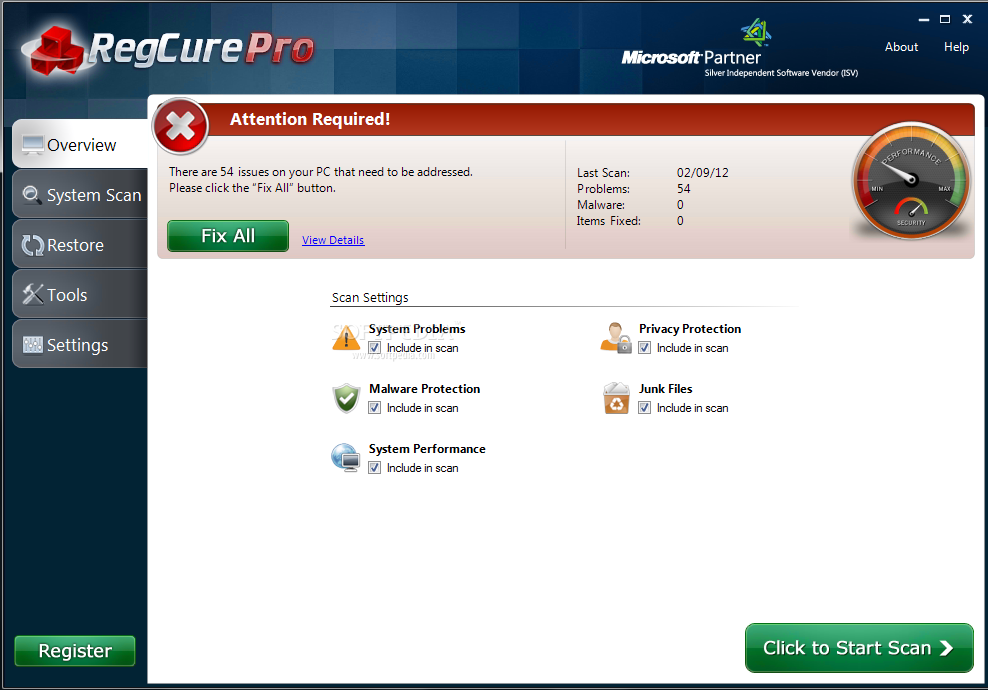
3.RegCure Pro will have a full scan to
detect all invalid files which will slow down your PC.
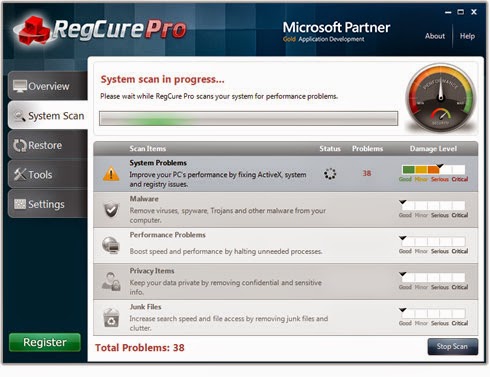
4.Click “Fix All” button on the down-right side to fix all problems and
speed up your computer after scanning the invalid leftover system files.

Note: Manual Spyhunter removal is suitable for expert users who have
experience of dealing with files and registry removal. Users who are lack of
computer techniques are recommended to get rid of Spyhunter 4 by using an
effective program removal tool.
If you are still not sure about how to fully uninstall Spyhunter 4, you could follow the program removal guides in the
video below:
No comments:
Post a Comment