
Cannot uninstall BlueCoat k9 from Google Chrome as the error messages stop your
removal procedures?
Are you desired to uninstall BlueCoat k9 from your laptop because it does not work
stably? The error messages pop up telling you the program can not work. And you
can do nothing but closing the error information dialog.

BlueCoat k9 is an outstanding software for you to use on the
internet. However, if it is broken or out of date, you need to remove BlueCoat
k9 instantly. Otherwise you will be annoyed about the corrupted message. And
you need to make sure it is completely removed from your laptop.
How to uninstall BlueCoat k9 completely with using Windows uninstaller?
For Windows 7, click “Start” menu, and go to the “Control Panel”. Double-click on the “Add
or Remove Programs”. Find BlueCoat k9 on the programs list, and then click “Change
or Remove” button. Follow the removal procedures until the job is done.

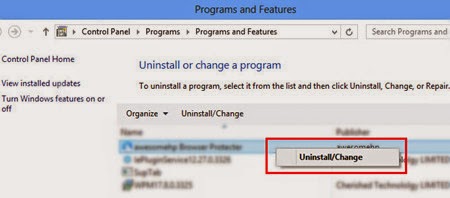
For Windows 8, click “Start” menu, and go to the “Control Panel”. Double-click on the “Programs
and Features”. Click “Uninstall a Program”. Find BlueCoat k9 on the programs
list, and then click “Uninstall” button. Follow the removal procedures until
the job is done.
And now most of BlueCoat k9 files have been
deleted. You need to ensure all of the files have been cleaned up. Therefore,
you should go to the registry editor because there are some related files and
extension leftover around your system. In this case, you have to remove their registry
entries.
Click on “Start Menu” again, and go to
click “Run” option.
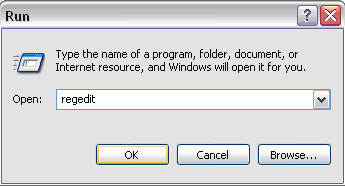
Type “regedit” and click “OK” to access the
Registry Editor.
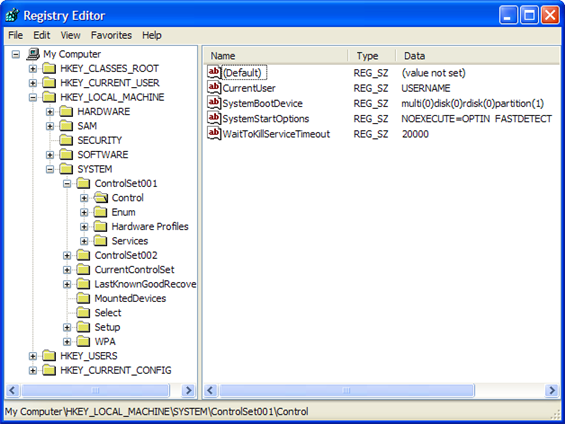
Delete all registry entries which are
related to BlueCoat k9. For instance,
HKEY_CURRENT_USER\SOFTWARE\BlueCoat k9
HKEY_LOCAL_MACHINE\SOFTWARE\BlueCoat k9.
Restart your laptop. And BlueCoat k9 has
been fully uninstalled.
WARNING: Using the Registry Editor incorrectly can cause serious problems
that may require you to reinstall your operating system. Editing the Registry
should only be done by experienced users or technicians. BlueCoat k9 cannot
guarantee that problems resulting from the incorrect use of the Registry Editor
can be solved. It is highly risky to handle these processes.
Thus, you could prefer a much more
effective and safer way to remove BlueCoat k9. The program uninstall tool is
your best choice. The removal tool can fully and automatically remove the
programs and their hidden related files.

Perfect
Uninstaller is one of the best uninstall tool in the market. It can enable
you to completely uninstall BlueCoat k9 with its powerful utility called “Force Uninstall”. And you will free up
your computer.
How to totally uninstall BlueCoat k9 with Perfect Uninstaller step by step?
If you can not follow the removal guides
above, it is advised you to get rid of BlueCoat k9 with Perfect Uninstaller as
following.

2.Close all running processes including programs
and browsers in the Task Manager before you run Perfect Uninstaller
3.Find and locate the program on the
currently installed programs list
4.Click “Uninstall” button on the right side to remove BlueCoat k9.
Alternately, you could force uninstall BlueCoat
k9 completely and easily with program uninstall tool.
Step
1: Run Perfect
Uninstaller
Step
2: Click the “Force
Uninstall” option on the interface of software uninstall tool
Step
3: Select the scanning program path. That means you
should locate and select the unwanted program for scanning. Usually it is
stored in C:\Program Files (x86) in Windows 7, Windows 8 and C:\Program
Files in Windows XP

Step
4: Select and click the “BlueCoat k9” folder.
Step
5: Click “Next”
button to follow the processes.
Step
6: Click "Next"
to start scanning the registry files about the unneeded program.

Step
7: It will take some time to finish registry
scanning. If you don't want to wait, you could click "Skip" option and cancel the scanning.

Step
8: After the registry scanning is completed, click
"Next" button to select
all related files.

Step
9: Click "Next"
button to delete all related files.

Step
10: Click “Finish”
button when it stops scanning files and extensions. After you finish the
onscreen removal steps, BlueCoat k9 has been deleted from your PC.
What’s more, you could double-check the
infection of the program with RegCure Pro to improve your PC performance.
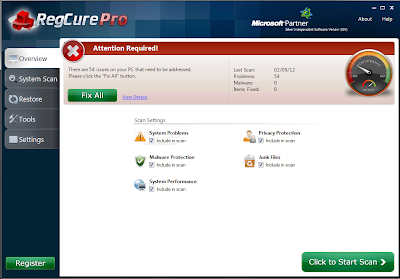
2.Click “Click to Start Scan” button to repair and optimize your computer.
3.RegCure Pro will have a full scan to
detect all invalid files which will slow down your PC.
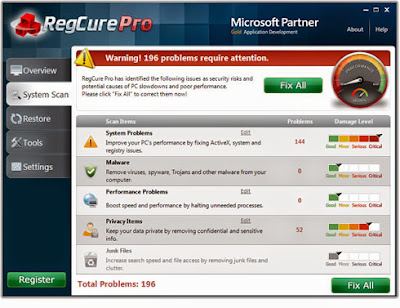
4. Click “Fix All” button on the down-right side to fix all problems and
speed up your computer after scanning the invalid leftover system files.
Can’t remove BlueCoat k9? There is no
problem to handle the BlueCoat k9 removal if you carefully and correctly follow
the software uninstall tips above.
Note: Manual BlueCoat k9 removal is suitable for expert users who have
experience of dealing with files and registry removal. Users who are lack of
computer techniques are recommended to get rid of BlueCoat k9 by using an
effective program removal tool.
No comments:
Post a Comment